Are you a coffee lover looking for ways to make your latte just as good as the one from your local cafe? If so, then this article is for you! Today we’re going to discuss how to froth milk without a frother. You don’t need fancy tools or expensive gadgets – all it takes is some basic kitchen items and know-how. With our easy tips and tricks, anyone can master the art of frothing milk like an expert barista!
Frothing milk may seem intimidating at first, but with these simple steps, you’ll be making perfect cold foam here in no time. We’ve tried and tested several methods that are sure to give any home barista consistent results every time. Whether you prefer steamed or non-steamed milk, we have instructions on how to get both types of foam right in your own kitchen. Even if you don’t have access to a traditional espresso machine, there are still plenty of options available for creating delicious drinks. So grab your ingredients, and let’s start learning what it takes to make the perfect cup of cappuccino!
Definition Of Frothed Milk
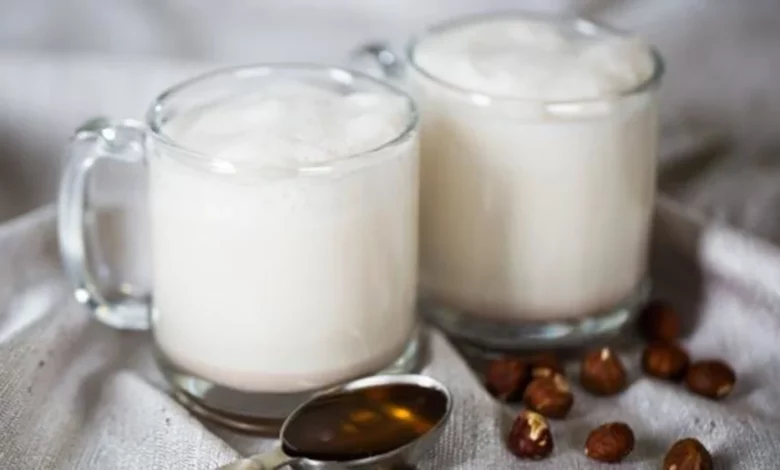
Frothed milk, also referred to as frothing milk or creating a milk froth, is the process of transforming regular cold or warm liquid milk into creamy and airy foam. This foamy substance is used for topping hot beverages such as cappuccinos, lattes, and macchiatos. It adds flavor to drinks while providing an additional layer of temperature insulation too.
Preparing The Milk
Now that we understand what frothed milk is, let’s explore how to make it without a traditional frother. It may seem difficult to produce this classic café-style beverage at home but with the right tools and techniques you can create delicious foam for your coffee drinks!
The first step in preparing milk for frothing is making sure that the temperature of the milk is just right. Milk that is too cold will not allow air bubbles to form properly and milk that is too hot will cause the fat molecules to break down resulting in an unpleasant consistency. The ideal temperature range for frothing milk should be between 130°F (54°C) – 145°F (63°C).
Once you have achieved the correct temperature, begin pouring the milk into a container such as a mason jar or large cup while swirling it around gently. This motion allows air to enter the liquid which helps to create small bubbles necessary for achieving dense foam. Be careful not to shake or stir vigorously as this could lead to over-frothing and result in an undesirable texture. With practice, you’ll soon become a pro at creating perfectly foamed milk!
If done correctly, you now have velvety smooth textured foam ready for use in lattes, cappuccinos and other types of coffee. Enjoy experimenting with different temperatures and consistencies until you find your perfect combination!
Shaking Method
The shaking method is one of the most popular methods for frothing milk without a frother. It involves vigorously shaking cold milk in a sealed container, such as a mason jar or French press, to create foam. This technique works best with both whole milk or cream and non-homogenized milk that contain fats that can be whipped into foam more easily.
To start, pour your desired amount of cold milk into an airtight container – the smaller it is, the better. Make sure you leave enough room at the top so there’s no risk of spilling over when you shake! Then, tightly seal the lid and begin shaking vigorously for about 30 seconds. As you do this, you should start to notice foamy bubbles forming on top of the liquid. Keep shaking until all of the milk has been aerated and thickened with foam. To test if it’s done properly, open up the lid slightly and tilt it sideways; If a layer of dense foam remains upright on top of the liquid then it was successful! All that’s left now is to spoon out some of that delicious creamy froth onto your coffee or hot chocolate before enjoying your beverage!
This simple yet effective technique takes some practice but, once mastered, will give you consistently great results every time! Plus, it’s much easier than using an electric frother which requires additional equipment and cleanup afterward. So why not try it yourself today?
Steaming Method

If you’re an avid, coffee drink – lover and don’t have a frother, fear not! You can still enjoy your favorite cappuccino or latte with the simple steaming method. With this technique, you’ll be able to create thick foam that’s just as good – if not better – than what you’d get from a machine. Let’s explore how it works!
To begin, heat up some milk on the stovetop until it reaches between 140-150 degrees Fahrenheit. Alternatively, use a microwave-safe glass container to warm up the milk for 1 minute at medium power (50%) in the microwave. Then transfer the hot milk into a metal pitcher or container of choice. Here comes the fun part: start by incorporating air into the mixture using quick back-and-forth motions; this is called steam frothing – don’t forget to shout “vroom vroom” whilst doing so! As you continue whisking faster and faster, small bubbles will form around the surface area of the pitcher. Keep going until you achieve desired texture for your foam – thick enough for a true cafe experience yet light enough to float atop your cup of joe like dew drops on grass blades!
Once done, pour out your foamed milk directly into your freshly brewed espresso shot or other beverage base and watch as it creates beautiful patterns when stirred together with its liquid counterpart. Enjoy your own homemade creation made possible with minimal effort required – perfect for those days when time is scarce but caffeine cravings are high!
Hand Blender Method
The Hand Blender Method is a great way to froth milk without a frother. It’s easy, quick, and doesn’t require any special equipment – all you need is a hand blender! Here’s how it works:
1. Heat up the milk until just before boiling point (around 70°C). This will help create foam for your desired texture.
2. Place the hot milk in a tall jug or container with an immersion blender inside.
3. Turn on the hand blender and immerse it into the bottom of the jug – start from low to medium speed and then increase gradually as you move the stick around while blending. The goal is to mix air into the liquid thoroughly so that there are no large bubbles present when done.
4. When finished, turn off the hand blender and check if you have achieved your desired frothy consistency. If not, repeat steps 3 & 4 until perfect!
Here’s what you should keep in mind when using this method to froth milk without a frother:
- The temperature of the milk can make a difference in terms of creating foam; too cold may result in poor results, whereas too hot might burn your fingers!
- Make sure to use a deep enough vessel so that none of its contents splash out during the blending process.
- Using specially designed attachments like those found on some models of Frothed Milk Blenders makes this task much easier than trying to do it by hand alone!
- Be careful not to overdo it, as excessive blending will produce dense and dry foam instead of the light fluffy one desired for cappuccinos etc…
Using these tips, anyone can master the art of frothing their own delicious beverages at home with ease, thanks to this simple yet effective Hand Blender Technique!
Using A Microwave To Froth Milk

Frothing milk can be likened to a magical transformation. It is almost like watching an alchemist turn lead into gold as the smooth, creamy foam appears from seemingly nothing. This same feat of magic can be accomplished without the need for any special tools or gadgets – simply using a microwave and a few other kitchen items.
The process begins with heating up the desired amount of milk in the microwave until it reaches your preferred temperature. Then use either a handheld frother or pour the heated milk back and forth between two containers. If you choose to go with this method, be sure not to overfill each container, as too much liquid may result in spilling while transferring. Continue doing this motion for approximately 30 seconds or until you have achieved sufficient foaming action.
Once complete, take care when pouring out the microwaved frothed milk so that none of it spills onto your countertop or stovetop (not recommended). You will now have rich and velvety-smooth steamed milk ready for coffee drinks such as cappuccinos and lattes! With simple instructions and just a few household items one can easily create barista-quality beverages at home anytime they wish – no sorcery needed!
Whipping Cream Method
If you don’t have a frother, this is the perfect alternative method for achieving frothy milk. The whipping cream method uses whipped cream to create a texture and consistency similar to that of using a frother.
For starters, make sure you use heavy whipping cream or double-whipping cream, as it creates more volume when beaten than regular single-whipping cream. Put your desired amount in a bowl and start whisking until soft peaks form – meaning they hold their shape but are still slightly wavy. Once done, add it to your cup of hot milk and watch as the mixture begins to froth up almost instantly! You can opt to stir with a spoon if preferred.
The great thing about this method is that you can customize the flavor according to your taste preferences by adding any syrups or spices before combining them into a cup of warm milk. With just two simple steps, not only do you get an amazing creamy texture without needing a cream frother, but also delicious flavors from whatever additives you added beforehand!
This is one of the quickest ways to get foamy milk at home without having to buy extra appliances like a cream frother. So next time you want something special in your coffee, try out this easy technique for some lusciously rich foam on top of your beverage!
French Press Method to froth milk without a frother
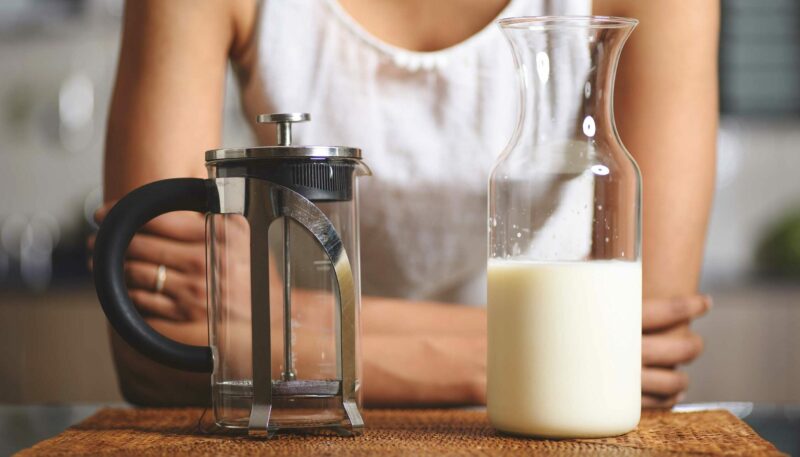
Another method for how to froth milk without a frother is the French Press method. It is a simple yet effective way to achieve cafe-quality milk foam, without the use of a frother. It can take your coffee brewing experience from average to extraordinary! The secret behind this technique is using an aerator, which helps turn milk into creamy, velvety perfection.
To get started with the French Press Method, you’ll need a few items: freshly ground coffee beans, cold water (preferably filtered or bottled), and a french press carafe. Begin by adding two tablespoons of coarsely-ground coffee beans per 8 ounces of water in the carafe. Gently stir the mixture and let it sit for 4 minutes before pressing down on the plunger until all grounds are at the bottom. This process creates great flavor extraction while also helping create some air pockets in the brew that will help when frothing later on.
Next comes the fun part: frothing! Pour your desired amount of cold milk into your brew and give it another gentle stir. Now you’re ready to begin pouring back and forth between two mugs or containers until desired texture is achieved – usually around 30 seconds or so, depending on how much milk you added initially. Once finished, pour your foamy concoction over ice for an amazing cup of latte art-worthy refreshment!
Using A Jar Or Bottle
Frothing milk without a frother is an easy, cost-effective way to enjoy latte art quality drinks at home. You can achieve the same results as with a frother by using a jar or bottle – two of the most popular methods for frothing without a device.
The jar method involves pouring cold, fresh milk into a tall container such as a mason jar, then tightly closing its lid and vigorously shaking it up and down between 10 and 15 seconds until you’ve reached your desired consistency. It’s important not to shake too hard or long as this may result in over-frothed milk. Once satisfied with the foaminess of the milk, open the jar slowly and pour out the contents into your espresso drink.
Read: How to drink espresso
A similar technique can be used when utilizing a bottle for frothing; however, there are some differences that should be taken into account when doing so. Firstly, ensure that the size of your chosen vessel isn’t too large compared to the amount of liquid inside it – if it is, you won’t have enough pressure built up within to create good foam. Secondly, rather than moving up and down like with jars, bottles require more rotational movements, which helps build even greater pressure on the liquid inside, creating richer microfoam bubbles. As soon as you reach your desired texture, stop agitating and pour directly onto your beverage.
Using An Aerolatte Whisk
Frothing milk without a frother is like trying to scale a mountain with only your hands: difficult but possible. An Aerolatte Whisk can help make the process easier and produce great results for any coffee lover. This aero-latte tool is an invaluable addition to anyone’s kitchen who loves preparing creamy espresso-based beverages.
The technique of using an Aerolatte Whisk requires very little effort on the user’s part and involves pouring cold or warm milk into a container and then placing the whisk inside. The user must then hold onto the handle while moving their hand up and down in a rapid motion until foam forms at the top of the container. It is important that both the speed and frequency are consistent throughout this motion so that it produces uniformly thick foam each time you use it. With practice, users will develop more control over how much air they add to their foamy concoction, which results in desired thickness as well as flavor profile enhancement when added to drinks such as lattes or cappuccinos.
Using an Aerolatte Whisk takes quite a bit of patience and skill if one wants to perfect their frothing technique; however, once mastered it is worth every minute spent practicing since it yields much better quality than most other methods used for making richly textured milk toppings for various hot drinks. Though not all alternatives may be able to replace traditional electric machines, those aspiring baristas should definitely consider adding an Aerolatte Whisk to their collection of coffee tools–it certainly won’t disappoint!
Tips For Successful Frothing
Now that you know how to use an Aerolatte whisk for frothing milk, here are some tips to help ensure successful frothing.
Frothing tips:
1. Use cold milk – Colder temperatures create a thicker foam faster and easier than warmer temperatures.
2. Heat the container first – By preheating your container with warm water, it will help keep the milk at the right temperature during the process of creating foam.
3. Don’t over-stir – If you stir too much, you may end up with flat or overly creamy foam instead of light and airy foam.
These simple steps can make all the difference when it comes to achieving perfect foamy milk! To begin, choose a good quality low fat or skimmed milk for best results; this is key in producing great foam every time. Once you have selected your desired type of milk pour it into your heated container until it’s two-thirds full – any more could be difficult to handle without making a mess! Next, start stirring vigorously using either an aerolatte whisk or handheld blender but take care not to go overboard as mentioned earlier; too much stirring can lead to dense, creamier foam rather than the light and fluffy one we desire when frothing milk! Finally stop when you’ve reached desired consistency which should look like thick clouds of white velvet on top or feel velvety smooth between fingers when dipped into cup before serving.
By following these simple steps, coffee aficionados everywhere can confidently master their own art of milk frothing and enjoy delicious lattes anytime they, please!
Benefits Of Frothed Milk
Frothed milk has many benefits that make it a popular choice when creating coffeehouse-style drinks. It’s easy to froth milk without the need for an expensive machine or specialty tool – all you need is a few simple pieces of kitchen equipment and some elbow grease. One of the biggest advantages of frothed milk is its rich, creamy texture which makes any beverage instantly more luxurious. The presence of tiny air bubbles also adds sweetness and helps create beautiful latte art designs.
When using an aerolatte device, you can even add lightness and fluffiness to dairy alternatives like soy and almond milk. This means vegans and those with dietary restrictions don’t have to miss out on enjoying their favorite hot beverages! You can also use your aerolatte or hand whisk to create delicious whipped cream toppings for desserts or sweet treats – adding flavor and a touch of indulgence in just minutes.
In short, frothed milk offers not only convenience but also added richness, sweetness, and aesthetics – making it ideal for all kinds of recipes, from lattes to milkshakes and drip coffee to desserts. Whether you’re looking for something special to impress friends at your next gathering or simply want to enjoy something extra decadent at home – why not give this technique a try?
FAQ on How to Froth Milk Without a Frother
What Types Of Milk Can I Use To Froth?
Frothing milk without a frother means you have to get creative and think about different techniques for producing the same result. There are many types of milk that can be used, but some work better than others. Oat, almond, coconut, skim, and heavy cream milk all present unique opportunities for creating your own frothy concoction – let’s take a look at each one:
Oat Milk – Oat milk is made from whole oats, which makes it an ideal source of calcium and other nutrients. Its creamy texture lends itself well to being frothed with minimal effort.
Almond Milk – Almond milk has become increasingly popular in recent years due to its versatility when making drinks such as lattes or cappuccinos. Its light sweetness will also add extra flavor to any beverage you create using this type of milk.
Coconut Milk – Coconut milk provides a rich and creamy froth that can easily be achieved without the use of a frother. The subtle nutty taste gives an added dimension to any hot drink without overpowering other flavors.
Skim Milk – This type of low-fat dairy product is great for those who want to enjoy the benefits of frothed milk while keeping their calorie intake down. As long as you whisk it vigorously by hand or use a blender, you should be able to achieve good results with skimmed milk as well.
Heavy Cream – For those looking for something more decadent, heavy cream offers up luxurious velvety-smooth foam every time! Be careful not to overdo it though; too much cream may make your finished drink overly sweet and thick.
So there we have it! Whether you’re after something light and airy like oat or almond milk, something richer like coconut or skimmed varieties, or even something indulgent like heavy cream – these are all viable options when it comes to creating delicious homemade froth without the need for expensive gadgets or equipment! So why not give them all a try?
Is Frothed Milk Healthy?
As the digital age continues to revolutionize our lives, it’s no surprise that frothed milk has become increasingly popular. After all, who doesn’t love a creamy and delicious cup of coffee? But despite its widespread popularity, many people have wondered – is frothed milk healthy?
The answer is yes! Frothed milk contains more nutrients than regular cow’s milk due to the fact that air bubbles are added in the process of frothing. This allows for an increased amount of vitamins and minerals to be retained within each serving of froth milk without altering the flavor significantly compared to non-frothed milk. Additionally, there are several health benefits associated with consuming froth milk, such as improved digestion and nutrient absorption.
Moreover, research shows that drinking frothed milk may help reduce your risk of developing certain chronic diseases like heart disease or diabetes. This is because it helps maintain a balanced diet by providing essential nutrients while reducing overall calorie intake. Furthermore, studies show that when consumed in moderation, froth milk can provide beneficial amounts of proteins and other important vitamins and minerals which can aid in promoting good health.
In short, if you’re looking for a tasty way to make sure you get enough nutrition throughout your day – then consider adding some froth into your morning routine! Not only will it give you an extra kick start but also help keep your body running at optimal levels by providing essential nutrients alongside deliciousness!
Can I Froth Cold Milk?
Frothing cold milk is a popular way to give coffee drinks a creamy and fluffy texture. If you’re looking for a creamy cup of joe, but don’t have access to an espresso machine or frother, there’s still hope! With some patience and practice, it can be possible to achieve great results when frothing cold milk at home.
When frothing cold milk, the key is in creating tiny bubbles that are small enough to create foam on top of your beverage. You’ll need a container with a lid that seals tightly – like a jar or shaker bottle – and something like an immersion blender or whisk to blend the liquid until it thickens. Before starting your froth-making process, make sure the container has been chilled in the refrigerator for at least 10 minutes. This will help ensure the best result when blending together your ingredients.
Once all of your preparations are complete, combine two parts of cold milk with one part of hot water (or use equal parts if desired). Place the lid onto your vessel and start mixing vigorously using either appliance mentioned above. It may take several minutes before you see visible signs of foam forming on top of your mixture – so keep stirring until you reach desired consistency. Once achieved, transfer your concoction into whatever type of beverage you’d like! Whether it be cappuccino, latte macchiato, or even homemade lattes – enjoy making barista-style creations from the comfort of home.
Making those perfect foamy beverages doesn’t have to require fancy equipment anymore; just follow these simple steps to get started on crafting delicious specialty coffees any time!
What Type Of Equipment Do I Need To Froth Milk?
Frothing milk requires the right equipment, and Coffee Experts have plenty of options to choose from. From a simple handheld whisk to an electric steam wand or even an immersion blender, there are tools that can get you frothy results without breaking the bank. Whether you’re looking for something quick and easy or want to invest in more professional-grade gear, here’s everything you need to know about what type of equipment is required to whip up perfect foam every time.
A milk frother is one of the most popular ways to achieve barista-style foamy goodness at home — it quickly whips air into cold or hot milk using vibrating blades or spinning discs inside a cup. This efficient tool churns out light and creamy foam with little effort, but they do come with a higher price tag than other methods.
If your budget doesn’t allow for this kind of investment, then don’t despair. A frothing jug will help produce silky microfoam when used with a handheld whisk; simply combine the ingredients until desired thickness is reached. For those who prefer something more automated, consider picking up an electric steam wand that injects pressurized steam into a liquid for added texture. Alternatively, an immersion blender can be used if you’re after maximum convenience — just make sure it comes with a specialized attachment designed especially for frothing liquids!
No matter which method you decide on, keep in mind that practice makes perfect when creating delicious cappuccinos and lattes — so grab yourself some quality coffee beans and start experimenting today!
How Long Does It Take To Froth Milk?
How long does it take to froth milk? Frothing time is an important factor when considering how to make the perfect cup of coffee or latte. But just how long should you spend on that all-important frothing process? Let’s break it down and find out!
When looking at the duration of frothing milk, there are a few things to consider; namely, the type of equipment used, as well as your own personal skill level and technique. Depending on what tools are available, you may be able to froth milk quickly – with only 30 seconds needed for a basic electric whisk – or it may take up to a few minutes if using traditional methods like steam wands from espresso machines. No matter which route you choose, Coffee Expert can help ensure delicious results every time.
Here are some tips for getting the most out of your frothing experience using:
An electric Whisk:
- Make sure the whisk is clean before use and always follow manufacturer instructions carefully. With practice, you’ll quickly become familiar with how long to whip each batch.
- If necessary, increase heat slightly while still avoiding boiling or burning the milk. This will help speed up the process without compromising quality.
Steam Wands:
- To heat milk and avoid scalding the milk, keep in mind that higher temperatures yield more foam but also require longer processing times.
- When first starting out, try experimenting with different techniques until you get comfortable enough with one method in particular. It could take several tries before really mastering steam wand technique.
No matter what kind of tool you have on hand – whether an electric whisk or a steam wand – Coffee Expert provides everything needed for creating creamy and smooth perfection every time! From choosing quality ingredients right through to enjoying that steaming hot mugful of deliciousness…we’ve got your back (or should we say front)! So why not start today and see exactly how easy it can be?
Conclusion
As a coffee expert, I can tell you that frothed milk is an essential part of making the perfect cup of cappuccino or latte. But what if you don’t have a frother? Don’t worry – it’s still possible to make delicious and creamy frothy milk without one! Different types of milk create different levels of foam, so experiment with whatever type of froth almond milk you prefer. Plus, when done correctly, frothing your own milk at home is healthier than store-bought alternatives. Cold milk will not produce as much foam, but heating it slightly in a microwave can do wonders for the amount and quality of the foam produced. You’ll need some basic kitchen equipment such as a whisk or blender to get started. Frothing takes about 2–3 minutes depending on how much air you incorporate into the mix – be patient! With practice and patience, anyone can learn how to make perfect foamy milk without any special tools or machines. So why wait? Let’s go whip up some magic!